- Note:
- Here you can find a brief overview of the main functionality of Smartlet. For a more detailed description of the components, please follow the supplied links. If you have comments, requests, etc. post them here or send me a mail.
- Pressing 'F1' (on Windows) from within the application will also guide you to the relevant documentation.
Requirements
First of all, you must be able to connect to the Smartlet database. Apart from the connection, you also need a Smartlet account. {About creating an account...} Once you have the account you can run Smartlet and connect to the database.
The main window
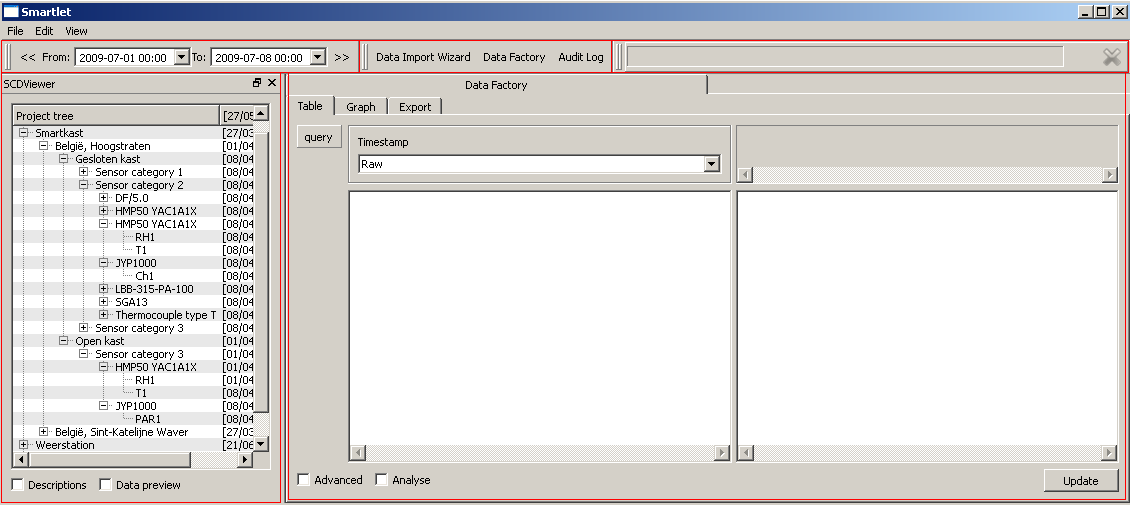
Smartlet main window consists of several components marked in red. The top left toolbar is the time constraint. It defines the global time frame in which data requests are handled. So this is the first thing you need to specify.
The toolbar in the middle shows several quick links for starting some of the main components. Once started they all run in the right window. For example, in the picture on can see that the data factory is running. An other way to run these and other components like the editors is through the menu bar on top.
The right toolbar is the progress bar. It shows whether there are any queued database requests. It also allows you to cancel them.
Below the time constraint you can find the project tree. What you can see and adjust depends on your user privileges. The project tree is mainly used as a quick overview of projects and its associated data.
Components
As already mentioned, the right bottom window is where the components run. Currently, there are several components:
For one, you have a component (wizard) for uploading data to the database. It is mainly meant for uploading many large text files. The way this works is as follows: First you make a template for a specific type of files. Then you save the template. Once saved it can be (re)used for uploading any collection of files based on that specific type.
For two there is a component for building custom tables which allows viewing, calibrating, filtering, plotting and exporting data.
For three, there is a component for auditing changes of your project and related members.
And finally there are the editors for managing users, project details, sensors and related members.
- Todo:
Doxygen stops copying at a (sub)section so \copydetails can not be used for the documentation. Couldn't find a descent alternative.
Refering to section "detailed description" should be possible. Currently only anchors are an option.